Using IPSec with X.509 certificates
Introduction
Windows XP can be configured to use IPSec with X.509 certificates. This guide explains how it can be impremented at no cost.
Installation
Prerequisites
You should have a basic knowledge of Windows and using the command prompt.
Windows XP Special Pack 2 should be installed.
Installing ipseccmd.exe
Download the Windows Support Tools for SP2 from the Microsoft website and install it. A command line tool, namely ipseccmd.exe, is included and it can be used to set up VPN tunnels using IPSec.
Configuration
Download the ipseces.msc MMC snap-in and double-click on it to add IPSec Policy Management functionality.
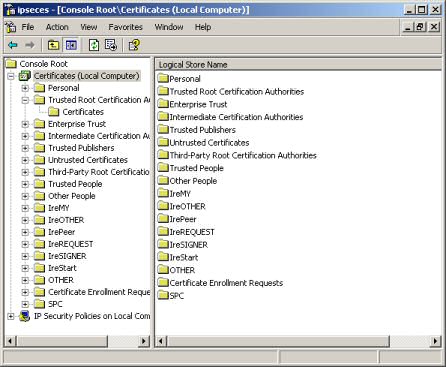
Assuming you are using a self-signed certificate, you should add the CA certificate and the user's certificate the first time as follows:
- Select Trusted Root Certificate Authorities in the left pane and right click
- Choose All Tasks/Import
- Click on the Next button in the Wizard
- Click on browse and pick the CA certificate (ca.crt for example)
- Click on the Next button
- Select Automatically select the certificate store based on the type of certificate
- Click on the Next button, then on the Finish button
You have successfully imported the CA certificate. The next step is to import the user's certificate.
- Select Personal in the left pane and right click
- Choose All Tasks/Import
- Click on the Next button in the Wizard
- Click on browse and pick the user's certificate (user.p12 for example)
- Click on the Next button
- Select Automatically select the certificate store based on the type of certificate
- Click on the Next button, then on the Finish button
Now that the certificates are imported, we have to find the issuer of the CA certificate.
- Select Trusted Root Certificate Authorities in the left pane and Certificates below it
- In the right pane, select the CA certificate which was imported
- Double click on it, then click on the Details Tab
- Click on Issuer
The details will be displayed as follows:
E = ca@example.com
CN = Eland Systems
OU = VPN
O = Eland Systems
L = Cape Town
S = CT
C = ZA
The information has to be formatted in reverse order for the example below. We will set up a VPN tunnel using ESP, 3DES and SHA.
192.168.0.1 is the IP address of our computer.
192.68.1.0/255.255.255.0 is the subnet of the remote LAN.
192.0.2.1 is the IP address of the VPN gateway.
Our X.509 certificate was issued by "C=ZA, S=CT, L=Cape Town, O=Eland Systems, OU=VPN, CN=Eland Systems, E=ca@example.com".
Type in the following three commands to set up the VPN tunnel:
- ipseccmd -u
- ipseccmd -f 0=192.168.1.0/255.255.255.0 -n ESP[3DES,SHA] -1k 3600S -t 192.0.2.1 -a c:"C=ZA, S=CT, L=Cape Town, O=Eland Systems, OU=VPN, CN=Eland Systems, E=ca@example.com" -1s 3DES-SHA-2 -r vpn
- ipseccmd -f 192.168.1.0/255.255.255.0=0 -n ESP[3DES,SHA] -1k 3600S -t 192.168.0.1 -a c:"C=ZA, S=CT, L=Cape Town, O=Eland Systems, OU=VPN, CN=Eland Systems, E=ca@example.com" -1s 3DES-SHA-2 -r vpn
The VPN tunnel is established when we access the 192.168.1.0/255.255.255.0 subnet range. We can, for example, ping 192.168.1.1 to bring up the VPN tunnel.
Feedback
If you have any comments, you can contact the author here.
http://www.elandsys.com/resources/ipsec/wincert.html